How to Paint Joycons: A Step-by-Step Guide for Customizing Your Controllers
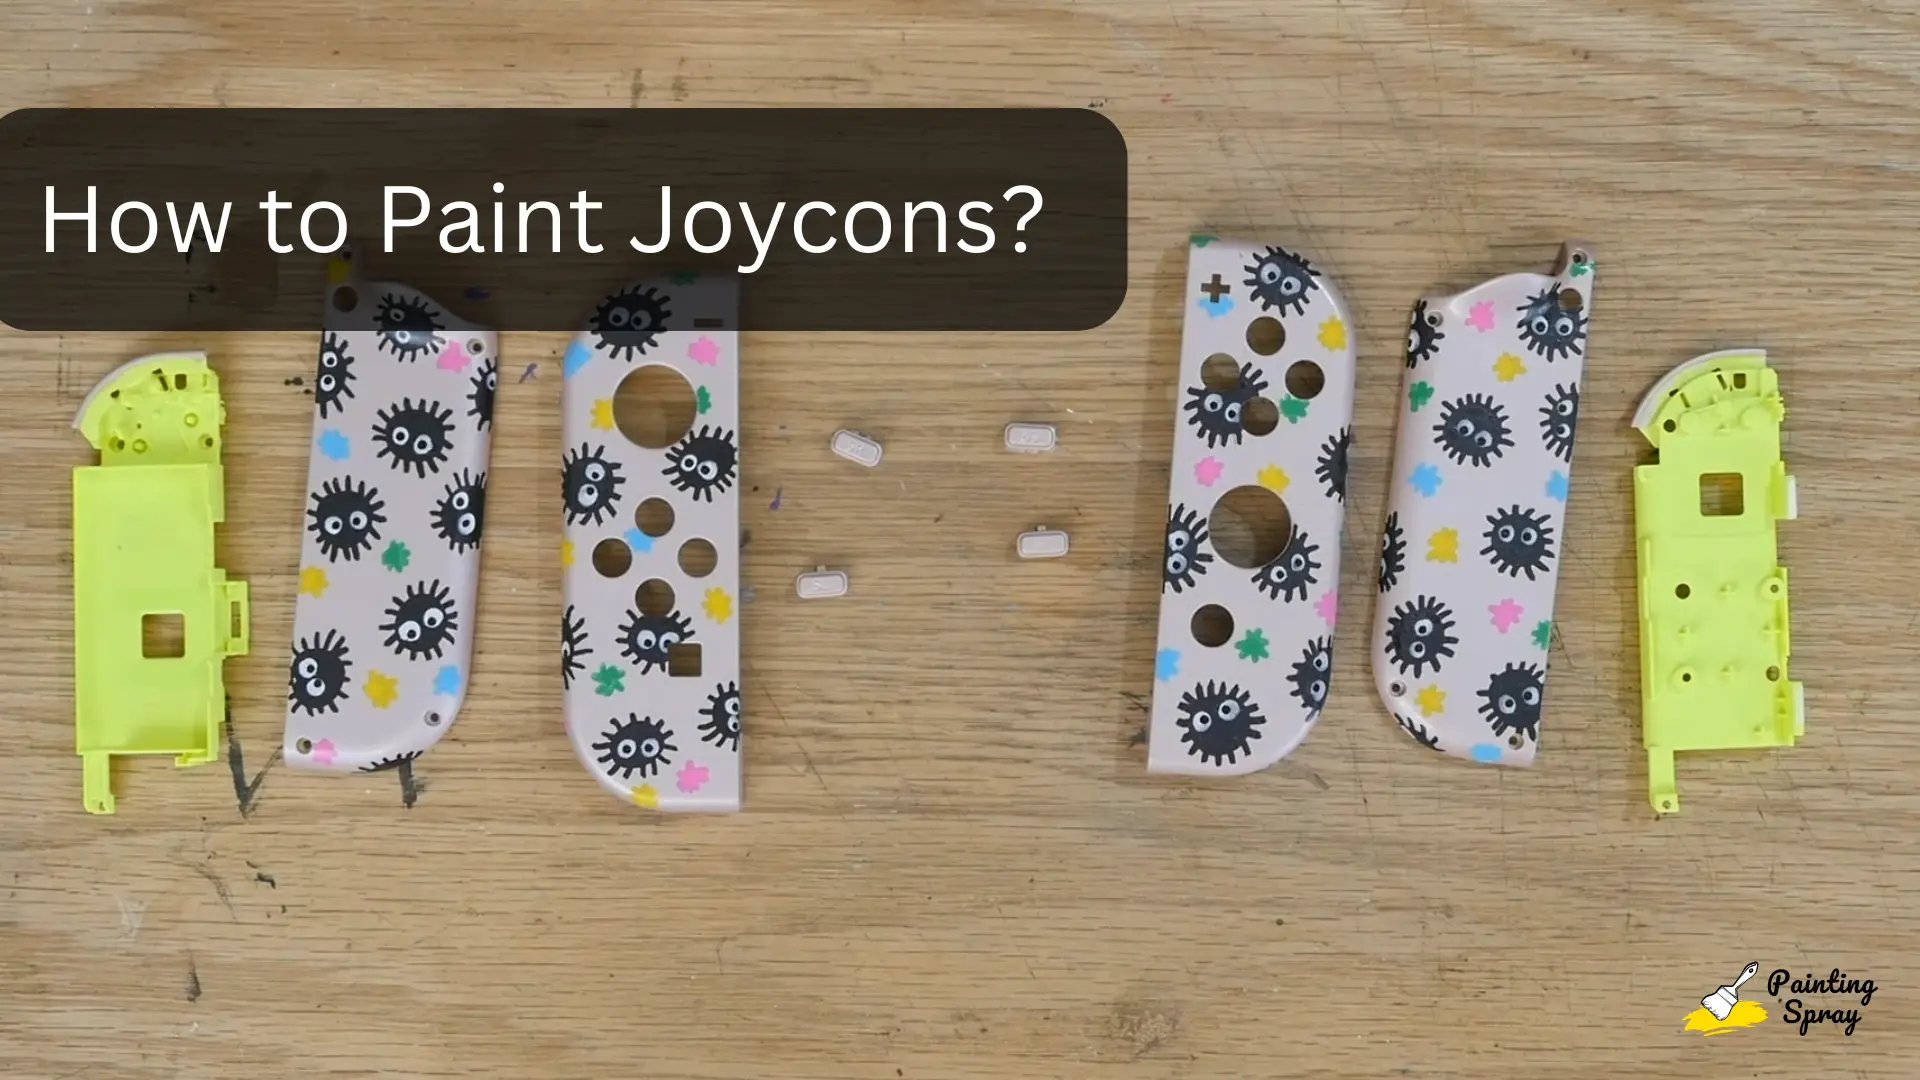
Personalizing your Nintendo Switch Joycons can be a fun project that adds unique style to your gaming experience. Painting your Joycons is safe if you use the right materials and techniques.
Knowing how to prepare and paint your Joycons properly will ensure a durable and vibrant finish.
Before you start, gather all the necessary supplies and take your time to prep the Joycons. This involves cleaning, sanding, and applying primer for the best results.
The painting process itself is straightforward and allows for creativity, giving you the chance to express your personality through your console.
Once everything is dry, reassemble your Joycons carefully to enjoy your new look. With the right approach, you can transform your gaming experience seamlessly.
Key Takeaways
- Use safe materials for painting to protect your Joycons.
- Proper preparation leads to a better finish and longer-lasting results.
- Reassembly is key to enjoying your newly painted Joycons.
Materials and Tools Needed
To successfully paint your Joycons, you will need specific types of paint and some essential supplies. Choosing the right materials is crucial to achieve a great finish and protect your controllers.
Choosing the Right Type of Paint
You can choose between spray paint and acrylic paint. Spray paint is popular for its smooth finish and ease of application. Look for matte or flat spray paint unless you want a glossy look. Make sure the paint is compatible with plastic surfaces for better adhesion.
Acrylic paint is also an option if you prefer working with a brush. It allows for more detailed designs but may require more layers for even coverage.
Always use a primer first to help the paint stick better. If you plan to do intricate designs, consider using a combination of both types.
Selecting Additional Supplies
Besides paint, gather the following tools:
- Sandpaper (400 grit and higher): This helps to smooth the surface before painting.
- Clear coat: This will protect your paint from damage.
- Paintbrushes: Useful if you choose acrylic paint for detailed work.
- Masking tape: Great for creating clean lines and protecting areas you do not want to paint.
- Drop cloth or newspaper: Protect your workspace from spills.
Finally, ensure you have good ventilation while working, especially if using spray paint.
Preparing Joycons for Painting
Before you start painting your Joycons, it’s essential to properly prepare them. This includes disassembling the controllers, cleaning them thoroughly, and priming the surfaces for better paint adhesion.
Paying attention to these steps will help you achieve a professional-looking finish.
Disassembly
To paint your Joycons effectively, you first need to disassemble them. Use a small screwdriver to remove the screws on the back of each Joycon. Be careful not to lose any parts.
Once the screws are out, gently lift off the back cover. You will see internal components, but you don’t need to touch those. Just focus on the outer plastic parts. Handle everything with care to avoid breaking any clips or damaging the controllers.
Cleaning and Sanding
After disassembly, it’s crucial to clean the surfaces. Use rubbing alcohol and a microfiber cloth to remove any dirt, grease, or fingerprints. This step ensures the paint adheres well.
Next, lightly sand the plastic surfaces using fine-grit sandpaper. This creates a rough texture that helps the paint stick better. Make sure to sand gently and evenly over the areas you plan to paint.
After sanding, clean off any dust with a cloth so that nothing interferes with the paint application.
Priming the Surface
Priming is an important step in preparing your Joycons for painting. Use a primer designed for plastic surfaces. Apply a thin, even coat to the areas you’ll be painting. This will help the paint adhere better and enhance the colors.
Allow the primer to dry completely before applying paint. It’s often recommended to apply multiple light coats of primer instead of one heavy coat to avoid drips. Ensure that the primer covers every visible area to get a uniform finish.
Painting Process
To paint your Joycons effectively, you will follow three key steps: applying a base coat, adding details and customizations, and sealing the paint to ensure durability. Each step is vital to achieving a professional look.
Applying the Base Coat
Start by preparing your Joycons. Use sandpaper to gently remove the existing surface coating. This helps the paint stick better.
Choose a matte or flat spray paint. Hold the can about 8 inches from the surface and apply thin, even coats. If you see paint dripping, reduce the amount you are applying.
Allow each coat to dry completely before adding the next. Usually, 2-3 coats of base color are sufficient for good coverage.
Ensure you are working in a well-ventilated area and wear a mask to avoid inhaling fumes.
Adding Details and Customizations
Once the base coat is dry, it’s time to add your unique touches. Use acrylic paint or specialized paint pens to draw designs or patterns. Acrylics adhere well to the spray-painted surface.
Be creative! You can add stripes, characters, or your favorite symbols. Use small brush sizes for detailed work. Wait for the added details to dry before moving on to the next step.
This stage is where your Joycons can become a reflection of your personality, so take your time and enjoy the process.
Sealing and Protecting the Paint
After your design is complete and dry, sealing the paint is crucial. Use a clear acrylic sealant spray. This adds protection against wear, scratches, and fading.
Spray a light, even layer over your painted Joycons. Hold the can about 8-10 inches away to avoid drips. Allow the sealant to dry thoroughly.
For extra protection, consider using a second coat of sealant. This step can help ensure that your custom designs stay vibrant and intact for a long time.
Reassembly and Aftercare
After painting your Joycons, careful reassembly and maintenance are key to ensuring they function well and look great. Follow these steps to put them back together and keep them in good condition.
Reassembling the Joycons
Once the paint has fully dried, it’s time to reassemble your Joycons. Start by gently placing the buttons and the shell back together. Make sure all parts align correctly to avoid any damage.
Important Points:
- Check for Dust: Before closing the Joycons, inspect for any dust or debris that could interfere with functionality.
- Secure Screws: Use the appropriate screwdriver to tighten screws. Ensure they are snug but not overly tightened to prevent stripping.
- Test Functionality: Once assembled, connect the Joycons to your Nintendo Switch. Check that all buttons and functionalities work as expected.
Maintenance Tips
To keep your painted Joycons looking fresh, proper maintenance is essential. Here are some tips:
- Avoid Harsh Cleaners: Use a soft, damp cloth to clean the surface. Harsh chemicals can damage the paint.
- Regular Checks: Periodically check for scratches or fading. If you notice any issues, touch up the paint as needed.
- Store Properly: When not in use, store your Joycons in a dry place to prevent moisture damage. A protective case is ideal for this.
By following these reassembly and maintenance tips, you’ll enjoy your customized Joycons for a long time.

